Create and Edit a Route
BeginnerThe essentials
A route is a series of waypoints joined by segments. It is used to prepare a passage, to follow it with GPS, or as the basis for a weather routing.
- Tap the round orange “+” button, then “Create route”. On a computer, you can also right-click on the chart, then “Create route”.
- Tap the chart at each waypoint, in order. A point placed near a POI snaps to it. Drag a point to move it; tap a segment to insert a point.
- Tap “Finish” in the banner at the top of the screen.
- Give the route a name in the “Save route” window and confirm.
The route is stored in the “Routes” tab of the left drawer. A route has at least 2 waypoints.
Going further
While creating or editing
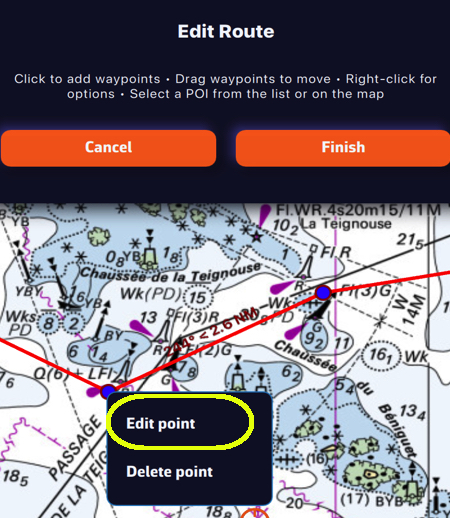 Editing a route: top banner, length and bearing of a segment, a point’s menu
The top banner is titled “Create route” (or “Edit route”) and recalls the gestures. Each segment shows its length and bearing.
- Add a point: tap (click) the chart. Points are named “Waypoint 01”, “Waypoint 02”… until you rename them.
- Snap to a POI: a point placed near a POI takes its position and name. You can also tap the POI itself.
- Insert a point: tap an existing segment.
- Move a point: drag it. On a touch screen, it is displayed slightly above your finger.
- Edit or delete a point: tap it (right-click on a computer), then “Edit point” or “Delete point”.
- Abort: “Cancel” leaves without saving anything.
A route never snaps to AIS targets, even when they are displayed.
The waypoint window
“Edit point” opens the waypoint window: its name, the “Show name on chart” box, its latitude and longitude (with the “Format” choice), and two passing settings.
The passing type, which routing respects:
- “Pass through this point” (default): the route goes through it;
- “Leave to port” or “Leave to starboard”: routing must pass on the correct side of the point, without necessarily touching it.
For the first and last points, the list is greyed out: they are always pass-through points. On the chart, a point to be left to starboard is green, a point to be left to port is red.
“Side:” (“None”, “Port”, “Starboard”): for a mark to be rounded, for example a race buoy, which side to leave it on. This is information for the crew: routing ignores it and keeps passing through the point. This selector is only active with “Pass through this point”.
The same mark can appear twice in a course with a different side at each passage. The side is then displayed in the Route details and in the Course tracking instrument (see Course tracking).
Create a route from your POIs
To chain existing POIs without tapping the chart, open the “Routes” tab and tap “From POI” at the bottom of the panel. The “Create route from POIs” window opens:
- Enter the route name.
- In the POI list, sorted by distance, name, latitude or longitude and filterable by name, tap the POIs in the order you will pass them. “New POI” creates one on the fly.
- In the route’s tab, reorder or remove points if needed, and choose for each one how to pass it, with the pill at the right of the line.
- Tap “Create route”.
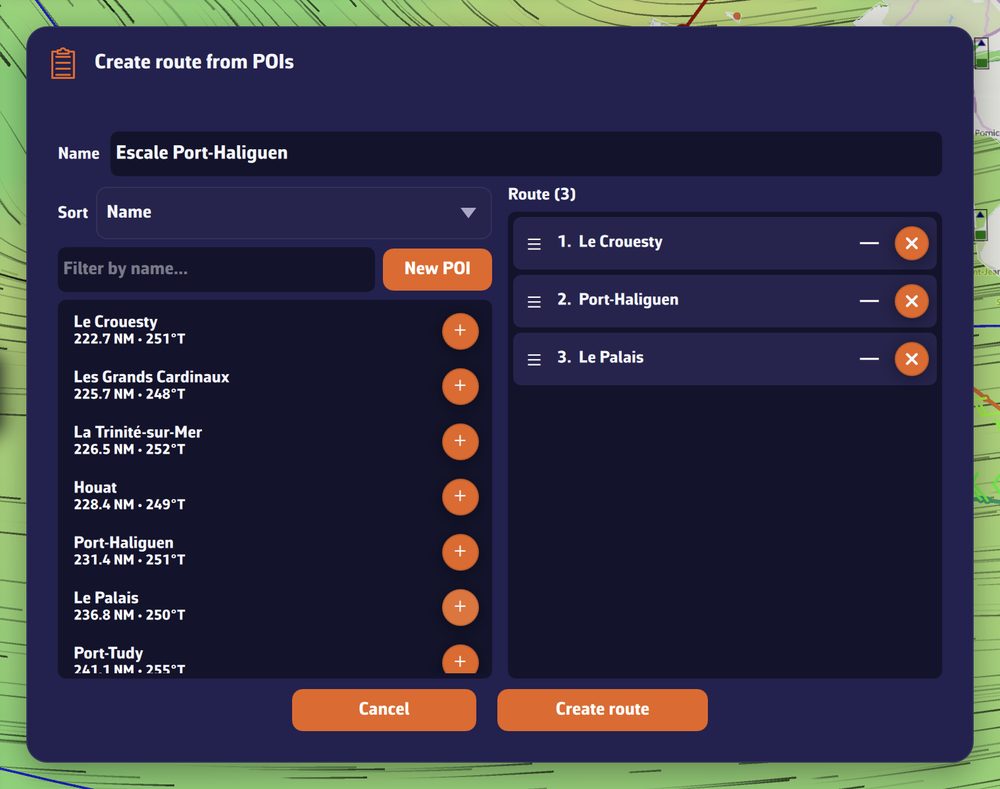 The “Create route from POIs” window: a route name entered, the POI list on the left and three POIs added in passing order on the right
You can also start from a POI on the chart: tap it and choose “Begin route”. The route starts from that point.
The Routes tab
Each route shows its length and, with a GPS position, the distance and bearing of its starting point (“Start”). “Sort” orders them by “Most recent”, “Alphabetical” or “Distance from start”; the “Filter by name…” field filters them. The eye shows or hides a route on the chart.
A route’s “⋮” button opens its menu:
| Entry | Effect |
|---|---|
| “Details” | The route’s passage table (see below). |
| “Edit on Map” | Reopens the route for editing on the chart. |
| “Edit from POIs” | Reopens the route in the POIs window. |
| “Rename” | Changes the route’s name. |
| “Duplicate” | Creates a copy named “(copy)”. |
| “Reverse” | Creates a new route sailed in the opposite direction, named “(reversed)”. Points to be left to port become starboard, and vice versa. The original route does not change. |
| “C-MAP AutoRouting” | On the C-MAP background only: see C-MAP AutoRouting. |
| “Export” (“Share” on phones and tablets) | See Import and export routes. |
| “Delete” | Deletes the route after confirmation. |
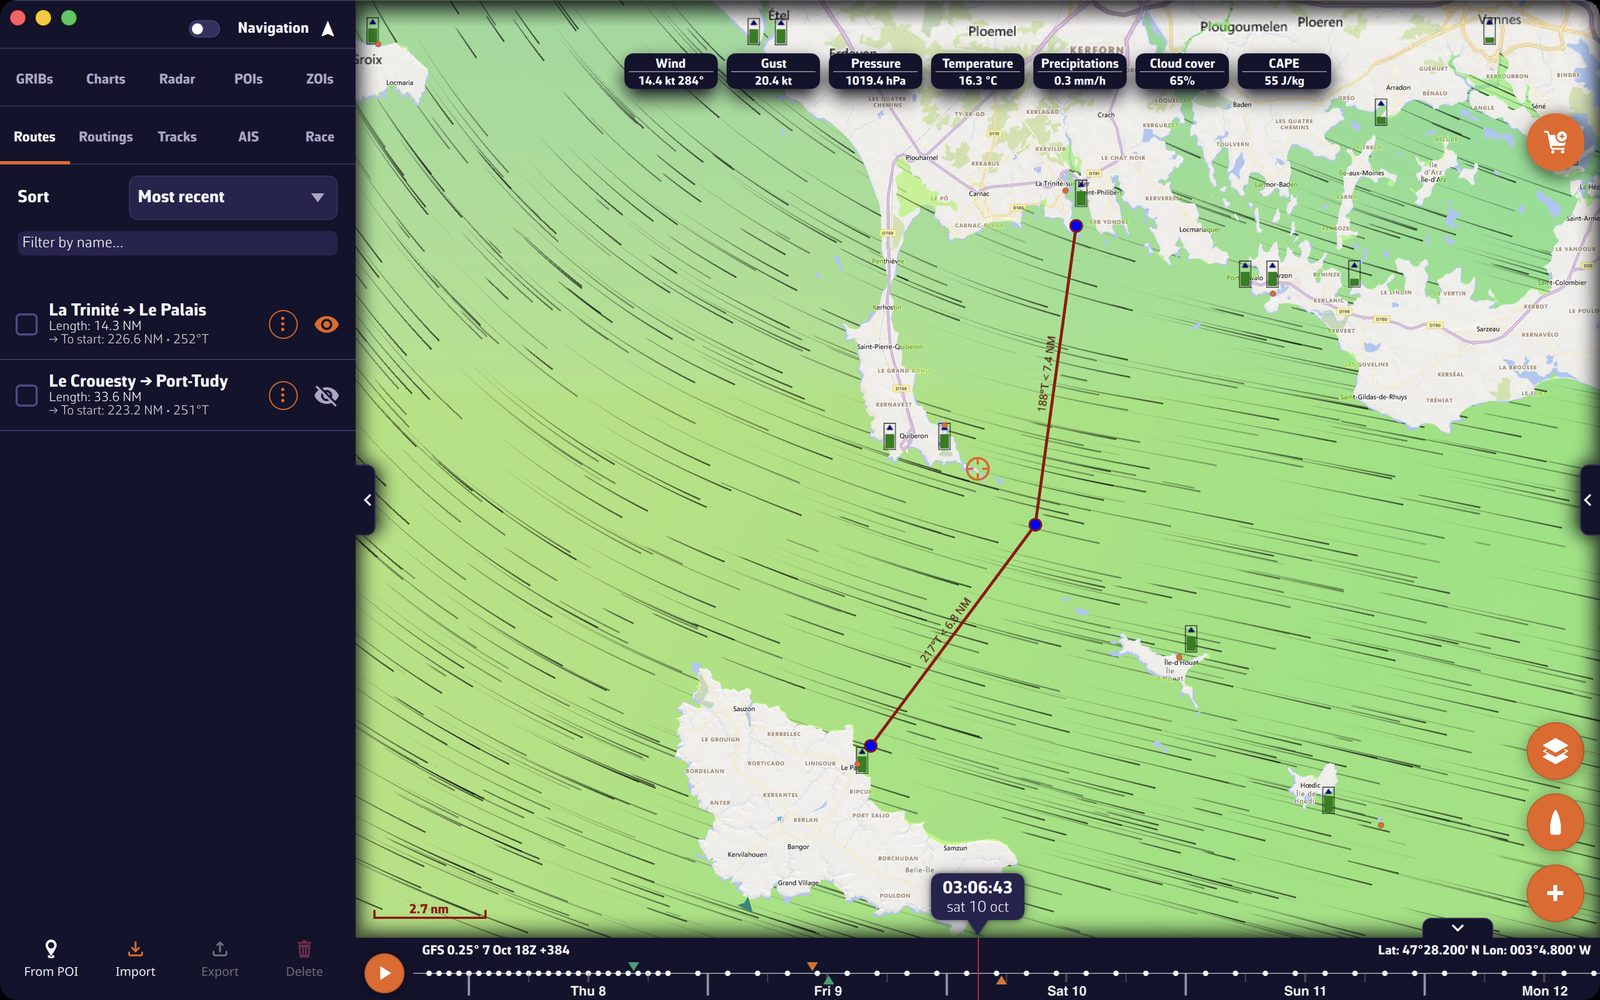 The Routes tab of the left drawer and a route displayed on the chart
The route menu on the chart
Tap a route displayed on the chart (a segment or a waypoint): its menu offers “Calculate routing”, “Edit route”, “Hide route” and “Delete route”. Tapped on a waypoint, it also offers “Follow route, start here”. While following, it offers “Go to this mark”, “Stop following” and “Reset XTE” (see Navigate to a POI and follow a route). On the C-MAP background, it also offers “C-MAP AutoRouting”.
Editing the route you are following suspends following for the duration of the edit; it then resumes at the mark reached, whether or not you save.
The route details
“Details” opens the route’s passage table, with its total length and one line per waypoint:
- DTW (Distance To Waypoint): length of the segment leading to this waypoint from the previous one;
- BTW (Bearing To Waypoint): bearing of that segment;
- DFS (Distance From Start): cumulative distance from the start;
- DTE (Distance To End): remaining distance to the finish.
Under each waypoint’s name, a pill indicates how to pass it. Tap it to choose among five entries: “Pass through this point”, “Round, leaving to port”, “Round, leaving to starboard”, “Leave to port” and “Leave to starboard”. This change moves no point: the followed route is updated without interrupting navigation.
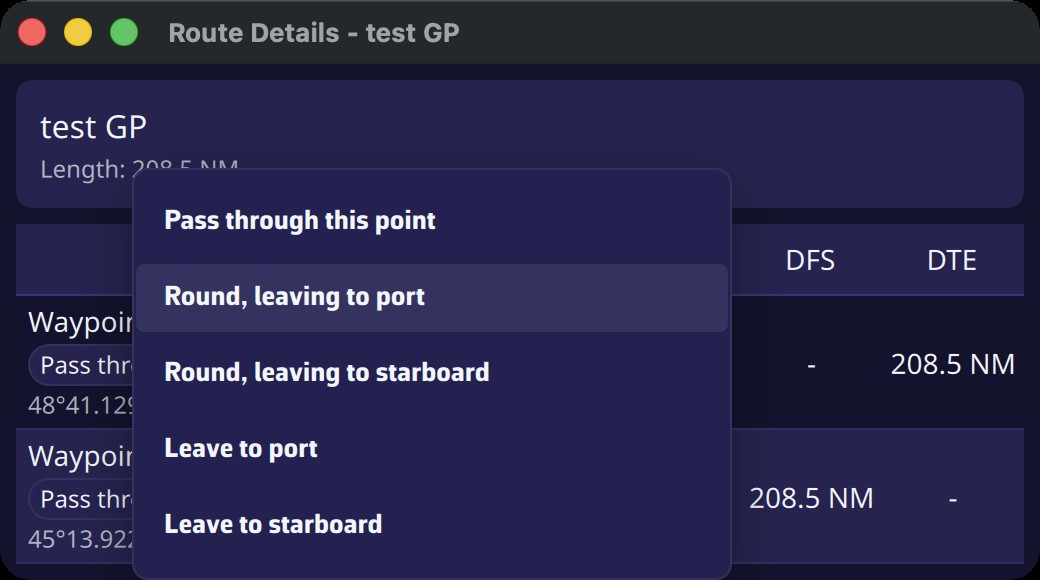 Route details: DTW, BTW, DFS, DTE columns and a mark’s passing menu
See also
- Navigate to a POI and follow a route
- Import and export routes
- Routings launched from the chart: calculate a routing from a route’s menu
- Manage routings: convert a routing into a route
- FAQ: How do I create, reverse, duplicate a route?
- FAQ: How do I edit a route?
- FAQ: How do I specify that a waypoint is to be left to starboard or port?
- FAQ: How do I indicate which side to leave a mark?