Instrument bar and instruments on the chart
BeginnerThe essentials
Instruments display the boat’s data in real time: position, speed, wind, depth, performance. They are arranged in a bar, at the top of the screen when the window is taller than it is wide, in a column at the side otherwise. Each instrument can also be placed on the chart, where it can be freely moved and resized.
- Add: tap the round orange “+” button at the bottom right, then “Add instrument”. Choose an instrument in the grid, then “Add to instrument bar” or “Add to chart”.
- Place at a precise spot: right-click (computer) or long-press (tablet, phone) on the chart, then “Add instrument”. The chosen instrument is placed where you touched.
- Set: right-click or long-press the instrument. Its settings open, with a preview that follows your changes.
- Move: drag a tile along the bar to change its rank, or across the bar to place it on the chart. Released on the bar, an instrument from the chart takes its place there.
- Delete: “Delete” button in the instrument’s settings, then confirm.
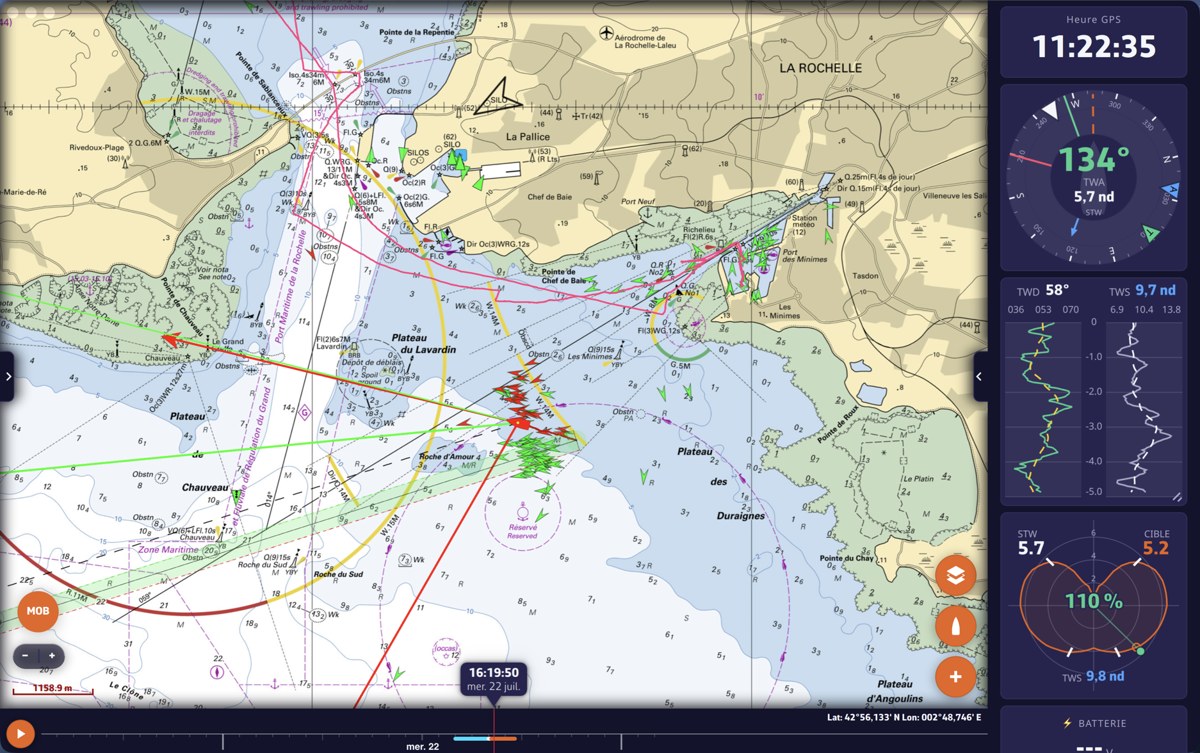 The instrument bar in a column to the right of the chart
Values are displayed in Navigation mode, during a Replay, or as soon as an NMEA connection sends data. NMEA is the protocol through which the boat’s electronics (navigation instruments, anemometer, depth sounder, GPS) transmit their measurements. Navigation mode and the NMEA connection both require the Premium subscription. In Navigation mode, the device’s GPS is enough for position, speed over ground and course over ground; wind, speed through water or depth come from the instruments, over NMEA.
Going further
The “Add instrument” grid
Each card in the grid shows an animated preview of the instrument, fed by the boat’s real data. The same instrument can be added several times: an orange badge shows how many copies are already displayed. You can, for example, place several “Numeric value” tiles, each with its own data.
An instrument added to the bar is placed at the head of the bar, to be visible immediately. If instruments were hidden, adding one shows them again.
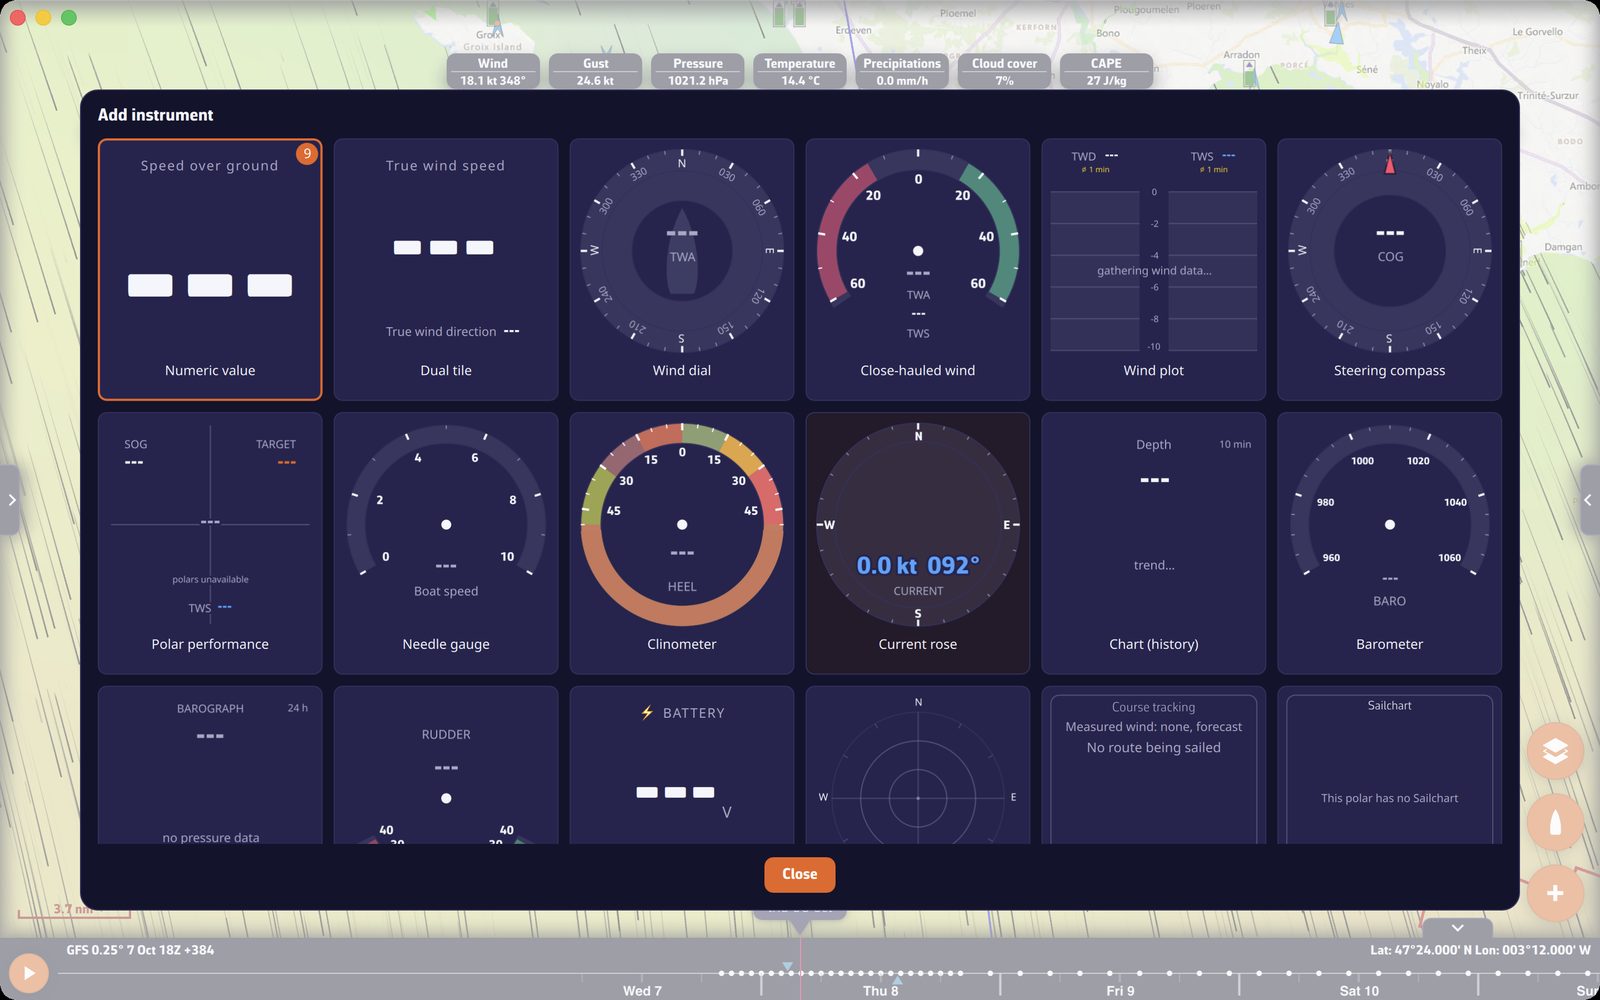 The “Add instrument” grid, opened from the right-click menu
An instrument’s settings
Right-clicking or long-pressing an instrument opens its settings window directly: the instrument’s name, a large preview, then the settings specific to its type (see Instrument types). You will always find:
- “Square tile background”, for round dials: the dial is displayed on a square tile rather than on a disc;
- “Delete”, which removes this copy after asking for confirmation;
- “Close”.
Most settings apply to this copy only: two “Numeric value” tiles show two different pieces of data. A few toggles are shared by all copies of a type: the wind angle (TWA or AWA) and the boat speed (STW or SOG) of the “Wind dial”, the angle of the “Close-hauled wind” instrument, the window and average of the “Wind plot”.
Reordering, placing on the chart, resizing
- Change the order: drag the tile along the bar; a slot opens where it will be inserted. On a touch screen, a long press first “lifts” the tile: a quick swipe scrolls the bar without moving anything.
- Place on the chart: drag the tile across the bar. It becomes a floating instrument. On the chart, a grid and alignment lines appear while you move it.
- Put back in the bar: release the floating instrument on the bar, where you want it.
- Resize the bar: with a mouse, drag its edge on the chart side; a double click makes the size automatic. On a touch screen, a small handle on the border does the same, and a double tap makes the size automatic.
- Resize a tile in the bar: rectangular tiles (graphs, Course tracking…) have a handle in their lower right corner.
- Resize an instrument on the chart: corner handle with a mouse, two-finger pinch on a touch screen.
Round dials stay round on the chart, unless you have ticked “Square tile background”.
On tablets and phones, the layout (bar and floating instruments) and the size of the bar are remembered separately in portrait and landscape: each orientation keeps its own arrangement.
The Settings > Instruments page
Open Settings with the “‹” handle at the right edge of the screen, then “Instruments”.
| Setting | Effect | Values | Default |
|---|---|---|---|
| “Visible” | Shows or hides all instruments, bar and chart | Yes / no | No |
| “Bar visible” | Collapses the bar only; instruments placed on the chart stay displayed | Yes / no | Yes |
| “Tile titles” | Tile titles as acronyms (SOG, TWA, BTW…) or as names (Speed over ground…) | “Acronyms”, “Names” | Acronyms on a screen under 7 inches, names elsewhere |
| “Damping” | Smoothing of values, see below | ||
| “Sparkline duration” | Period covered by the small curve of numeric tiles | 5 to 60 min | 5 min |
| “Orientation” | Bar at the top or in a column | “Auto”, “Horizontal”, “Vertical” | Auto |
In “Auto”, the bar goes to the top when the window is taller than it is wide, and in a column otherwise.
The “Visible” choice is remembered separately for Navigation mode on and off. The window shown when you switch Navigation mode also offers the “Show instruments” box.
The sparkline is ticked or unticked tile by tile, in the settings of each “Numeric value”. It is only drawn in Navigation mode, and only for data that lends itself to it: never for a time, a position or a name, for example.
Predefined layouts
At the bottom of the same page, “Load” offers four ready-made layouts, and those you have saved:
- “GPS”: GPS time, speed and course over ground, latitude, longitude, name, distance, bearing and time to the waypoint;
- “Cruising”: Wind dial, speed over ground, course over ground, speed through water, true wind direction and speed, depth, distance, bearing and time to the waypoint;
- “Upwind”: Close-hauled wind, Wind plot, Polar performance, then speed through water, true wind angle and speed, VMG, heading, distance and time to the layline;
- “Downwind”: Wind dial, Polar performance, then speed over ground, speed through water, true wind direction and speed, VMG, downwind target angle, waypoint VMC.
VMG is the speed of approach along the wind axis; VMC, the speed of approach toward the waypoint; the layline, the line from which you reach the mark on a single tack.
“Save configuration” saves the complete layout under a name: bar order, settings of each tile, instruments placed on the chart with their size and position. “Delete configuration” erases a saved layout.
Layouts are specific to each device: they do not sync between your phone and your computer, whose screens have nothing in common.
Damping
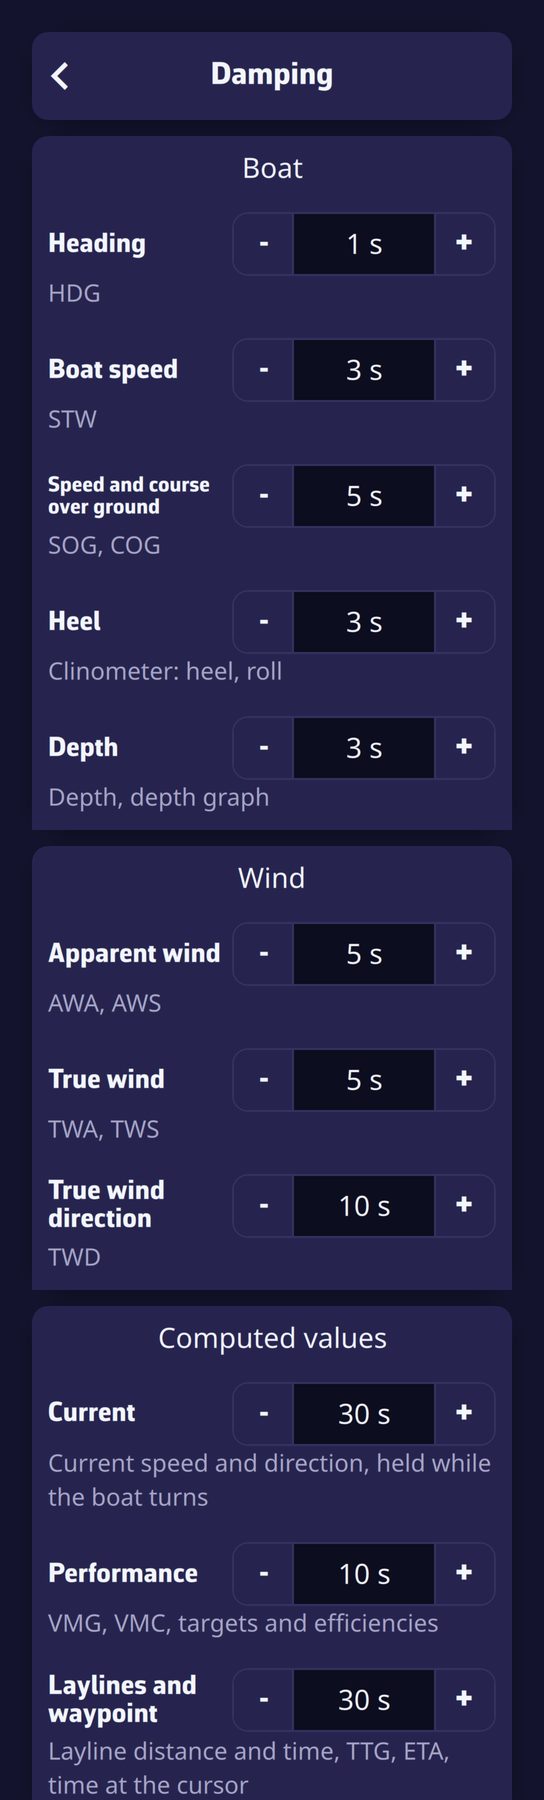 The Damping page, one time per group of values
Settings > Instruments > “Damping” sets the smoothing of values, group by group, from 0 (no smoothing) to 60 seconds. The time chosen is that of a moving average.
| Group | Setting | Values concerned | Default |
|---|---|---|---|
| Boat | “Heading” | HDG | 1 s |
| “Boat speed” | STW | 3 s | |
| “Speed and course over ground” | SOG, COG | 5 s | |
| “Heel” | Clinometer: heel, roll | 3 s | |
| “Depth” | Depth, depth graph | 3 s | |
| Wind | “Apparent wind” | AWA, AWS | 5 s |
| “True wind” | TWA, TWS | 5 s | |
| “True wind direction” | TWD | 10 s | |
| Computed values | “Current” | Current speed and direction, frozen when the boat turns | 30 s |
| “Performance” | VMG, VMC, targets and efficiencies | 10 s | |
| “Laylines and waypoint” | Distance and time to layline, TTG, ETA, time at cursor | 30 s |
The “Default values” button restores these original values. Dials, alarms, laylines and the recorded track follow the damped values; only the RMC and VTG sentences sent out as NMEA output keep the raw speed and course. These settings depend on the boat’s sensors, not on the device: they are tied to your account.
Acronyms: HDG heading, STW speed through water, SOG speed over ground, COG course over ground, AWA and AWS apparent wind angle and speed, TWA, TWS and TWD true wind angle, speed and direction, TTG time to go, ETA estimated time of arrival.
See also
- Instrument types
- Course tracking
- Barometer and barograph
- Navigation: GPS, NMEA and AIS, to connect the boat’s instruments
- Getting started and interface, for the “+” button and Navigation mode
- FAQ: What are the instruments for and how do I customize them?
- FAQ: How do I change the instruments displayed?