The Main Screen
BeginnerThe essentials
The chart fills the whole screen. Move it by dragging, zoom by pinching (on a computer, with the wheel). Everything else sits around it:
- Left edge: a chevron handle opens the left drawer and its tabs (GRIBs, Charts, Routes, Routings, Tracks, AIS…), with the “Navigation” switch at the top.
- Right edge: a chevron handle opens the Settings.
- Bottom right: the round orange buttons. From top to bottom: layers
 , centring on the boat
  and the “+” menu
  .
. - Bottom: the timeline, the forecast time bar, as soon as a weather file or a routing is displayed.
- Top: the pills that give the weather at the point you are aiming at (the “target”), at the timeline’s time.
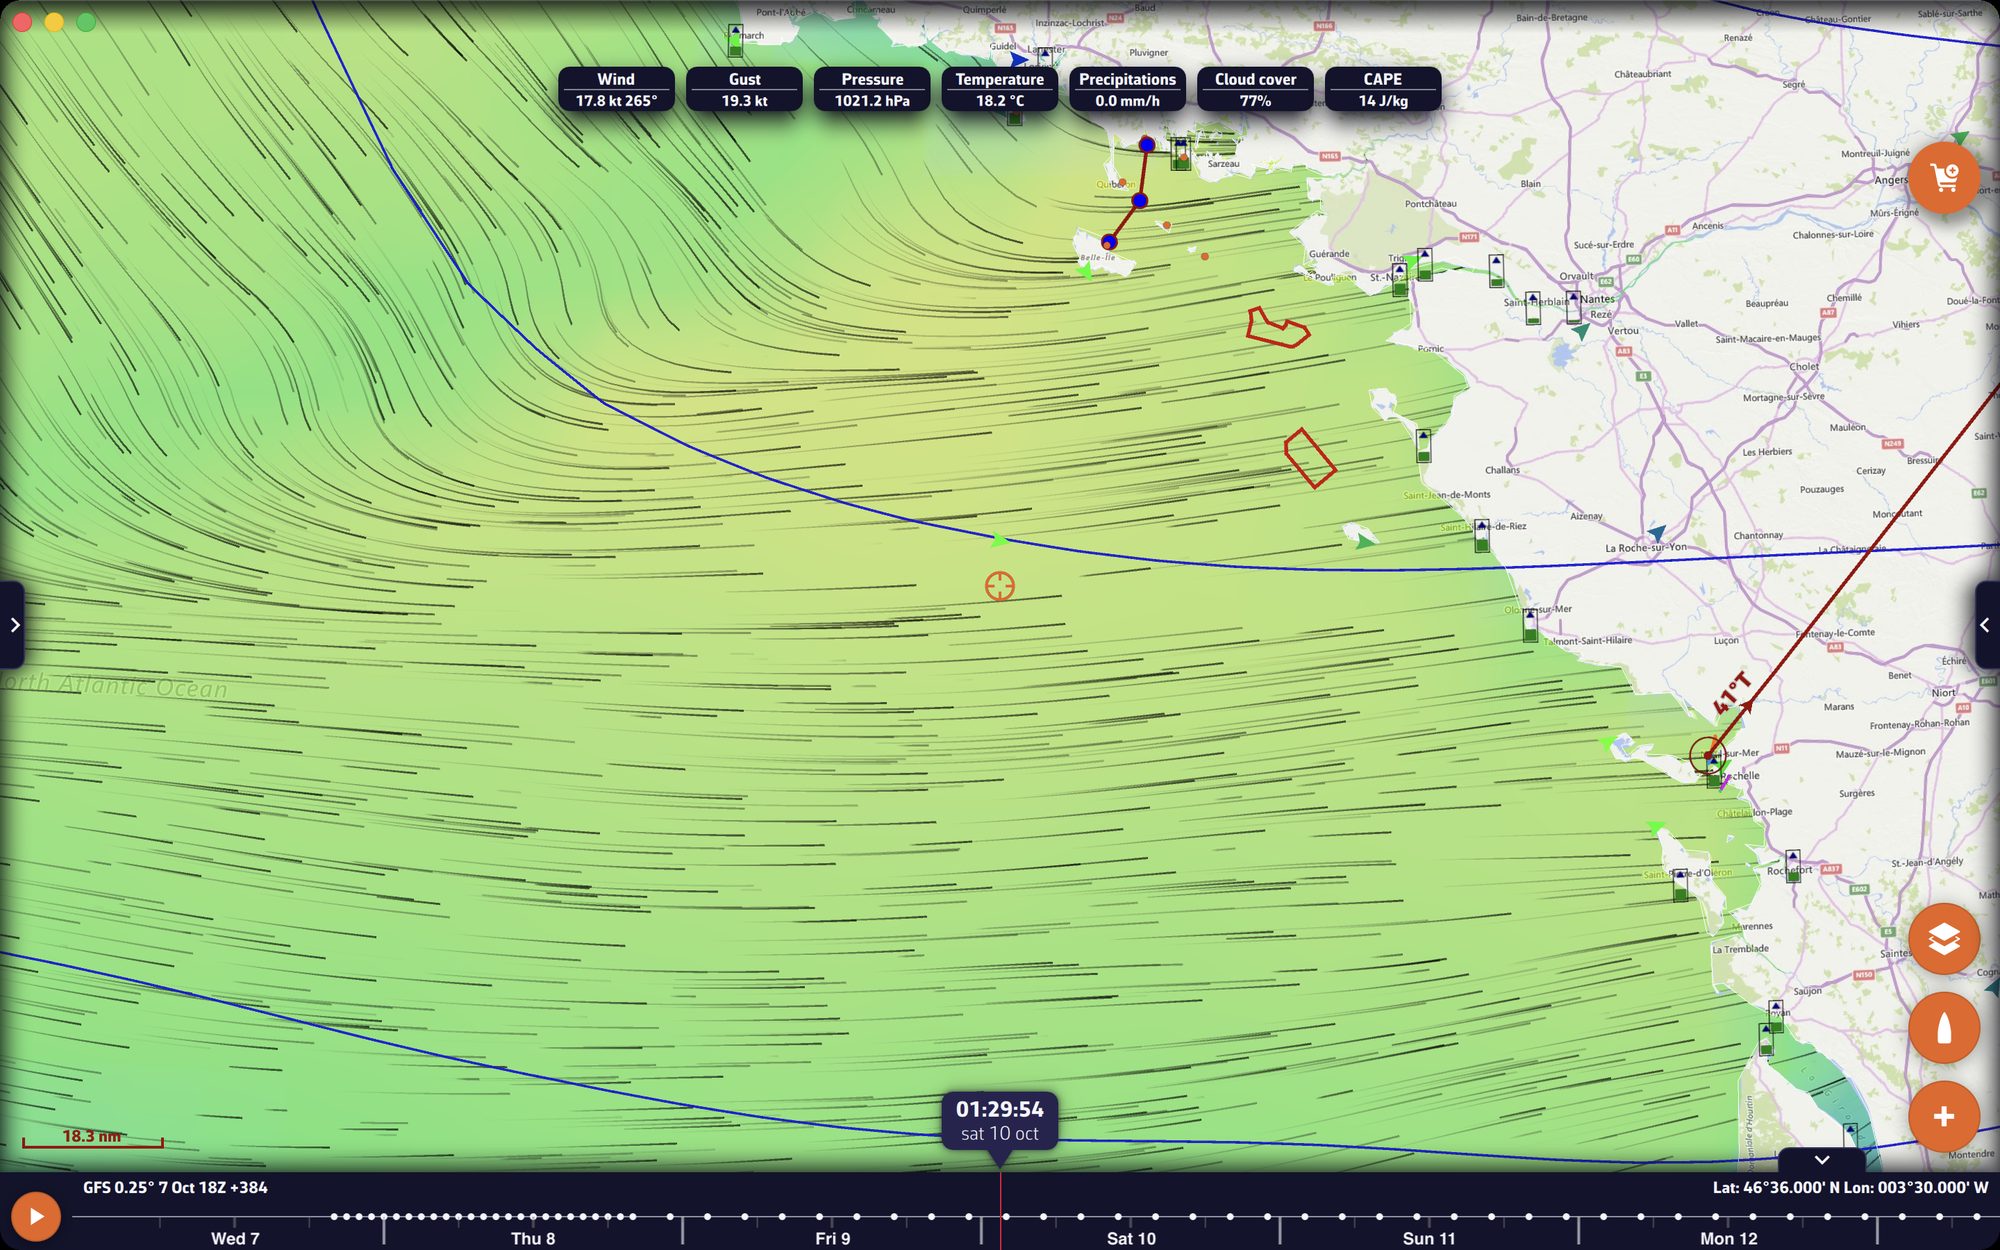 The main screen with a wind GRIB displayed on the Bay of Biscay
Going further
The left drawer
The handle on the left edge opens and closes this drawer. At the top, the “Navigation” switch turns on Navigation mode (Premium subscription); the arrow icon to its right indicates, in Navigation mode, the quality of the GPS position. See Operating modes.
Below it, ten tabs on two rows:
| Tab | Content | Chapter |
|---|---|---|
| GRIBs | the downloaded forecast files | Weather: GRIB |
| Charts | the weather charts of official services (isobars, fronts) | Weather: observations |
| Radar | the rain radar sources | Weather: observations |
| POIs | the points of interest | POIs, routes and ZOIs |
| ZOIs | the zones of interest (no-go zones, information zones) | POIs, routes and ZOIs |
| Routes | your routes | POIs, routes and ZOIs |
| Routings | the calculated routings | Weather routing |
| Tracks | the recorded navigations | Tracks and logbook |
| AIS | the vessels received by AIS | Navigation: GPS, NMEA and AIS |
| Race | race tracking | Racing and fleets |
The “Charts” tab does not contain the nautical charts: these are chosen in the Layers menu.
The Settings drawer
The handle on the right edge opens and closes the Settings; it always stays visible. At the top of the drawer, on either side of the “Settings” title:
- the “?” icon opens the site’s FAQ;
- the person icon opens your account (sign in, sign out). See NavimetriX account.
In a sub-page, the chevron at the top left takes you back to the previous page. The list of sections is described in General settings.
The round buttons
- Layers: opens the Layers menu (chart background, orientation, forecast display, displayed layers).
- Boat: one tap recentres the chart on the boat’s position. Without a GPS position, on a computer, the app falls back to an approximate position of the device. A long press recentres and zooms on the boat.
- “+”: the actions menu (download a GRIB, create a route, calculate a routing…). See The + button and the chart menus.
- Add a logbook entry (page icon with a “+”): appears above the boat button in Navigation mode, while a track is being recorded. It opens a new logbook entry, dated and positioned at the moment of the tap. On a phone in landscape, this button does not appear: use the entry of the same name in the “+” menu.
- Subscription: as long as the device is not subscribed, a round orange button with a shopping cart is displayed at the top right of the chart. See Premium subscription.
On a phone in landscape, the round buttons shrink and line up on the timeline’s side.
Bottom left
- The scale: a red line followed by the distance it represents, in nautical miles (nm) or metres.
- The zoom buttons “−” and “+”, if the “Zoom buttons” box is ticked in the Layers menu. A held press zooms continuously.
- The MOB button (man overboard), if it is enabled in Settings > “General” > “MOB button”. It only appears in Navigation mode, with a GPS position. A long press of one and a half seconds triggers it. See the chapter Safety.
The values at the top of the screen
When a GRIB is displayed, a row of pills gives its values at the target point (wind, gusts, pressure…), at the timeline’s time. The target point is set in the Layers menu: the centre of the screen by default, the GPS position or a POI. Tap a pill to display under the row the evolution of that parameter over time, at the same point (this requires an active target); tap it again to hide it. These pills are written in the theme’s text colour. When a routing is selected and visible, a second row, just below, gives that routing’s values at the same timeline time, written in the colour of that routing’s line: you can thus tell at a glance the GRIB’s weather from your routing’s.
The timeline
The timeline appears as soon as a GRIB, a routing, the current atlas or the rain radar is displayed.
- Drag it to move forward or back in time: the chart follows.
- Tap a point on the timeline to jump to that time.
- Tap the time bubble, at the centre, to return to now. When the timeline follows real time, the time is shown in orange, with seconds. If the displayed data does not cover the present moment (a GRIB that is too old, for example), the timeline cannot reach it.
- The play button ▶, at the left of the timeline, scrolls through the forecasts, or the displayed routing, in a loop.
- At the top left, the timeline recalls the model of the displayed GRIB and its run (the time at which the model was calculated); at the top right, the target’s coordinates. When the timeline is not displayed, these coordinates move to the bottom right corner.
- On phones and tablets, the timeline grows under your finger and retracts two seconds later.
- Settings > “General” > “Timeline scale” stretches the timeline from 100 to 500%: the larger the value, the more room an hour takes, and the finer the jump on touch (1 h at 100%, 30 min at 200%, 15 min at 300%, 10 min at 400%, 5 min at 500%).
Fold the timeline. A chevron handle, above the right end of the timeline, folds it to free the chart; this choice is remembered. When the timeline is a horizontal banner (phone in portrait, tablet, computer), this handle is always there. If the timeline has disappeared, first check that it is not folded, then that a weather file or a routing is actually displayed.
Phone in landscape. On small screens (phones and tablets under 8.5 inches diagonal), the timeline becomes a vertical column on the edge of the screen, on the side opposite the camera, with the future at the top. The fold handle is only offered there if it has a neighbour: a column of instruments or an open drawer beside it. Without a neighbour, the timeline cannot be folded and reappears by itself: to fold it, simply hide the instruments and close the drawers.
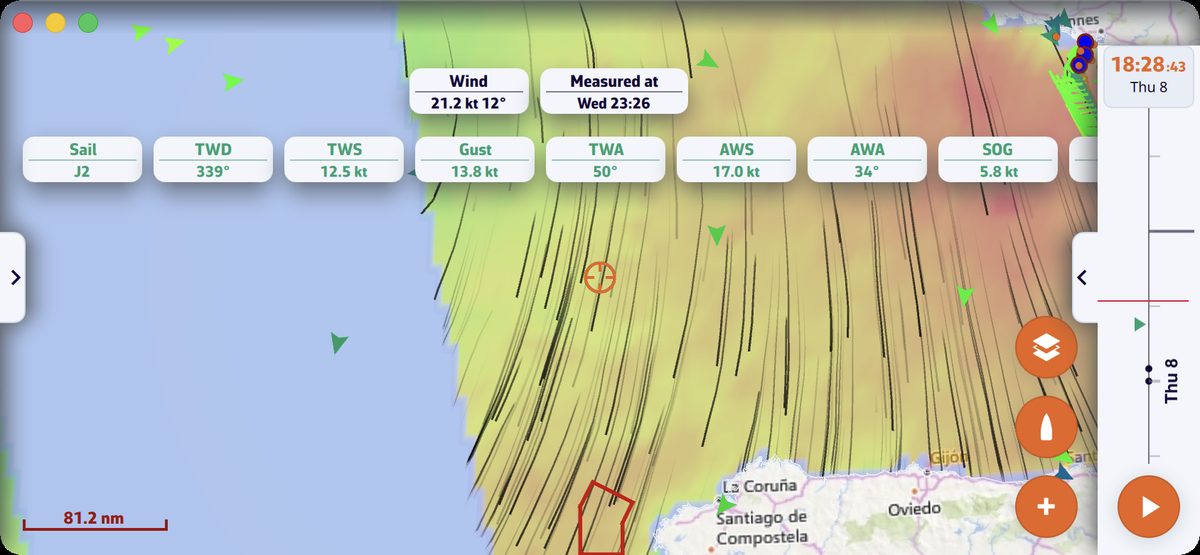 Phone in landscape: wind GRIB displayed and timeline as a vertical column on the right edge, play button at the foot
The instruments
When you display them (“Show instruments” box in the window that opens when Navigation mode is turned on, or Settings > “Instruments” > “Visible”), the instruments are placed as a banner at the top of the screen in portrait, as a column on the right edge in landscape. See the chapter Instruments.
Full screen on a computer
On Mac and PC, the standard system shortcut (F11 on Windows, Ctrl + Cmd + F on Mac) puts the window in full screen; this choice is remembered.