Geogarage charts
BeginnerThe essentials
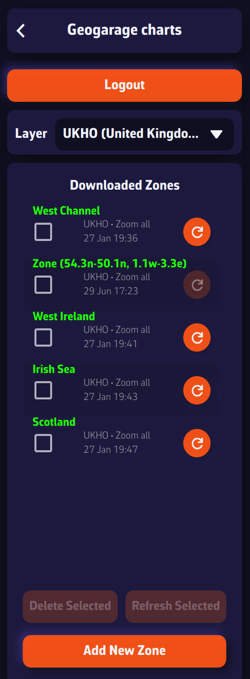 Geogarage charts settings: Logout button, SHOM layer, downloaded zones
Geogarage distributes the nautical charts of many hydrographic services (SHOM, NOAA, BSH and the British service…). A Geogarage subscription gives access to all the charts of a service. You subscribe with Geogarage, then enter your Geogarage credentials in NavimetriX: the charts are then displayed online, and you can download zones of them to view without Internet.
- Open Settings, then “Geogarage charts”.
- Tap “Login” and enter the email address (or username) and password of your Geogarage account. The message “Login successful! You are now connected to Geogarage.” confirms the connection.
- In the “Layer” list, choose the service you subscribed to, for example SHOM.
- On the chart, open the layers menu (round orange button at the bottom right) and choose “Geogarage” in the “Maps” section. The list on the right lets you change layer.
- To navigate offline, go back to “Geogarage charts” and tap “Add New Zone” (see below).
Going further
The Geogarage account
- The account and subscriptions are managed with Geogarage, not in NavimetriX. A space at the beginning or end of the password is ignored: avoid them.
- When signed out, the page offers “Sign up to Geogarage” and “Access my account” links, which open the Geogarage website. On iPhone, iPad and Mac, it offers instead a “Need help” link to our FAQ. The login window offers “Forgot password” (or “Need help” on Apple devices).
- Without an Internet connection, the button shows “Offline” and stays inactive. The list of already known layers and the downloaded zones remain accessible.
- Your Geogarage username is part of the settings synchronized by your NavimetriX account. The choice of the displayed layer and the downloaded zones remain specific to each device.
- The first time you display a layer, NavimetriX shows the attribution text of its publisher (source and rights of the charts). It does not appear again afterwards, on any of your devices.
To subscribe, choose a service according to your sailing area and check the coverage of each, see the FAQ Geogarage catalog and How do I get nautical charts?.
Downloading a zone for offline use
Without a download, Geogarage charts are only displayed when the device is connected to the Internet. A downloaded zone is displayed everywhere, even offshore.
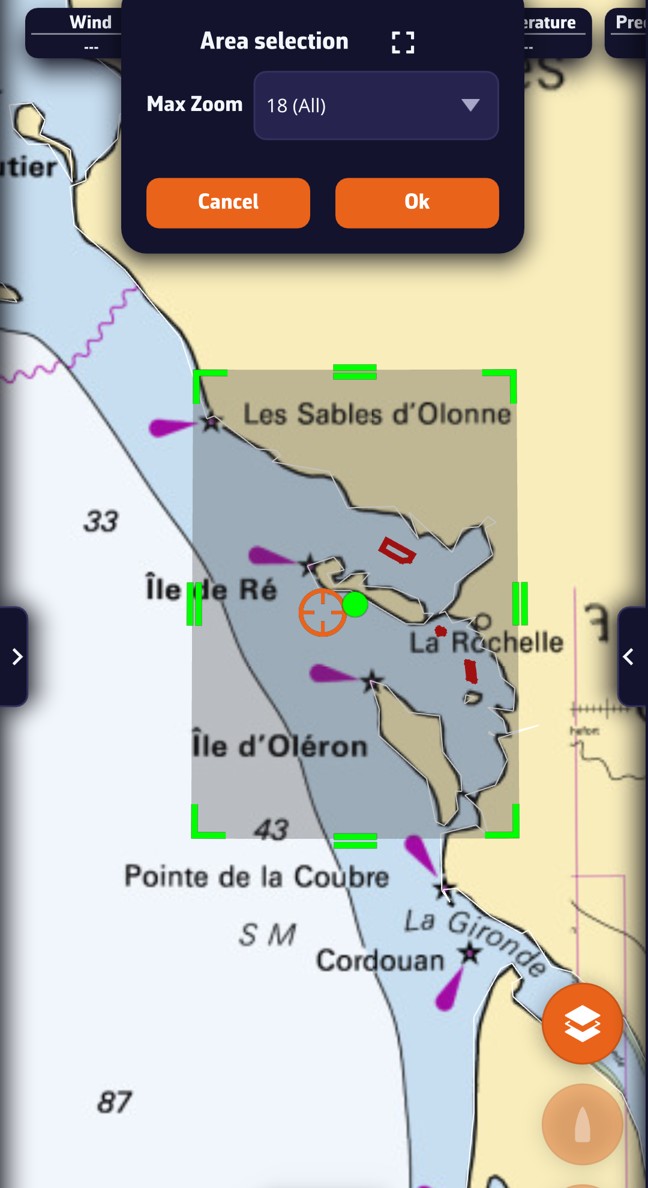 Selecting a new Geogarage zone: rectangle with green handles on the chart and “Area selection” panel with the “Max Zoom” setting
- In “Geogarage charts”, check the chosen “Layer”: the zone will be downloaded from this service.
- Tap “Add New Zone”. On a phone, the settings drawer closes to make room for the chart.
- A rectangle appears. Move it and adjust its corners to cover your area.
- Choose the “Max Zoom”:
- “18 (All)”: all scales, down to harbor and anchorage plans. The zone is limited to 25 square degrees, for example 5° × 5°.
- “11 (Offshore)”: only small-scale charts (passage and crossing charts), over a much larger zone, up to 2,500 square degrees, for example 50° × 50°.
- If the message “Selected zone is too large” appears, reduce the rectangle or switch to “11 (Offshore)”. Then tap “OK”.
The panel then shows the progress as a percentage and the size already received. Several zones can complement each other: an “All” level over your sailing basin and an “Offshore” level for the crossing, for example.
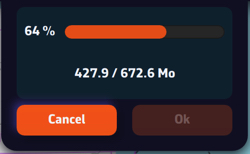 Progress of a Geogarage zone download
Managing downloaded zones
The “Downloaded Zones” list shows the zones of the chosen layer. While the page is open, their outline is drawn on the chart. Each zone shows its layer, the chosen “Max Zoom” (“all” or “offshore”) and the download date. Its name is green for an “all” zoom, orange for an “offshore” zoom.
- Center: tap a zone to center the chart on it.
- Rename: long-press (or long-click) its name, enter the new name and confirm. The name is not synchronized between your devices, nor are the zones.
- Refresh: when the service publishes a new edition of its charts, the round refresh button to the right of the zone becomes active. Tap it to download the zone again; the old file is deleted once the new one is received, and the chosen name is kept. To refresh several, tick them and tap “Refresh Selected”: they are downloaded one after the other.
- Delete: tick one or more zones, tap “Delete Selected” and confirm.
If a failure message appears when the request is made, check that the zone is actually covered by the chosen layer: the service may not publish any chart at that location.
See also
- Base maps and orientation, including Geogarage charts in night mode
- C-MAP charts: purchase, account and zones
- FAQ: How do I activate the charts subscribed to with Geogarage?
- FAQ: How do I download charts for offline use?
- FAQ: How do I rename downloaded charts?