Several methods let you measure distances:
Manual measurement

Using the round orange “+” button, you can perform several measurements on the chart. Select Add a new measure, then move the endpoints. The vector displays the distance and true bearing.
On a computer, you can also right-click the chart and choose Add a measure: the measure starts from that point. On a touch screen, place two fingers on the chart and hold them still for a little over half a second: a measure is created between the two fingers.
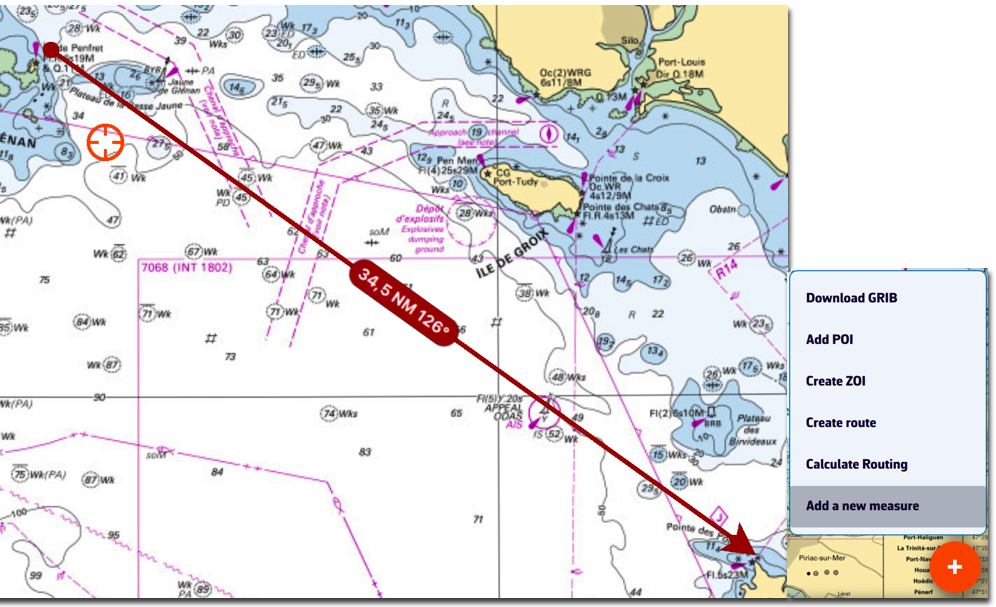
To delete the measure, tap/click the data label in the middle of the arrow. Tapping/clicking an endpoint opens a menu offering Delete measure.
The origin and/or end of the arrow may snap to a POI. The centre label still deletes the measure with a single tap/click.
Automatic measurement

From the layers button, check the Auto measure display option:
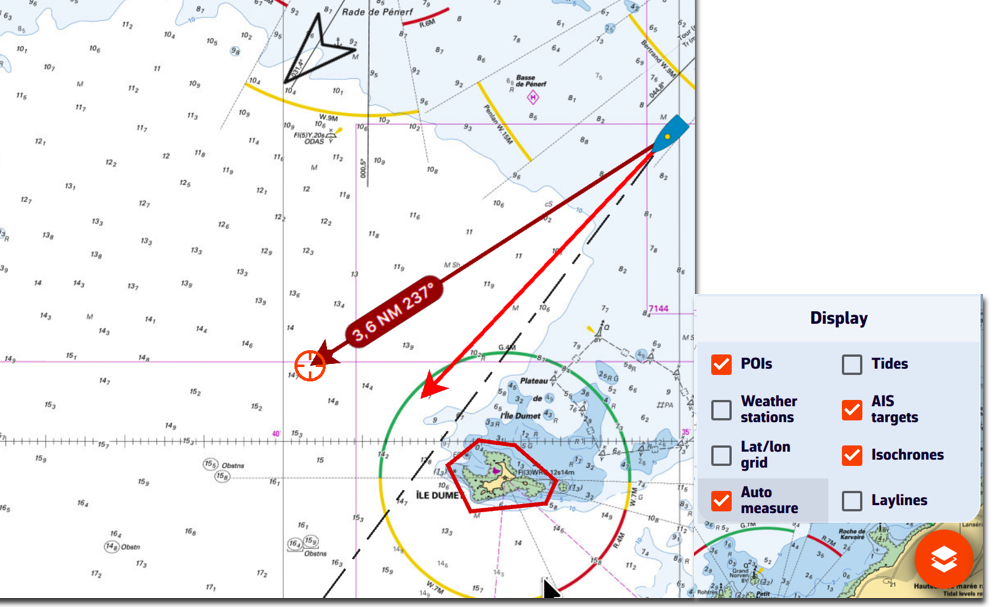
The measurement arrow is automatically displayed from your position toward the target in the centre of the screen. Simply move the chart under the target to the desired location. The distance vector is then displayed for a short time, giving you time to read the distance and true bearing. Each time the chart is moved under the target, the vector is redrawn.
You can disable the distance vector display by unchecking the Auto measure box.
Cursor measure (computer)
On a computer, the Cursor measure box of the same layers menu draws a line from your boat to the mouse pointer, with the distance, bearing and time to go. It does not exist on touch screens, where a finger cannot hover over the chart.